控制用户在应用程序中可以执行或不能执行的操作是构建实际应用程序时需要做的最重要的事情之一。
例如,在待办事项应用程序中,您不希望用户能够编辑或删除其他用户的待办事项。
在本文中,您将学习在 laravel 中实现此目的的无缝方法之一,即使用策略来控制用户可以通过构建简单的待办事项应用程序执行哪些操作。
要学习本教程,您需要对 laravel 及其应用程序结构有基本的了解。
创建基础应用程序
运行以下命令在所需文件夹中创建一个新的 laravel 应用程序并移入其中:
composer create-project laravel/laravel todo-app && cd todo-app
接下来,运行以下命令来安装 laravel breeze:
php artisan breeze:install
breeze 将通过身份验证构建您的新应用程序,以便您的用户可以注册、登录、注销和查看他们的个性化仪表板。
之后,通过运行以下命令编译您的应用程序资产:
npm install && npm run dev
laravel 默认情况下附带基于文件的 sqlite 数据库,因此您需要做的下一件事是将应用程序数据库文件连接到数据库查看器,例如 tableplus 或任何其他您喜欢的数据库查看器。
将数据库连接到查看器后,运行以下命令将可用表迁移到数据库中:
php artisan migrate
完成后,运行以下命令在浏览器中查看您的应用程序:
php artisan serve
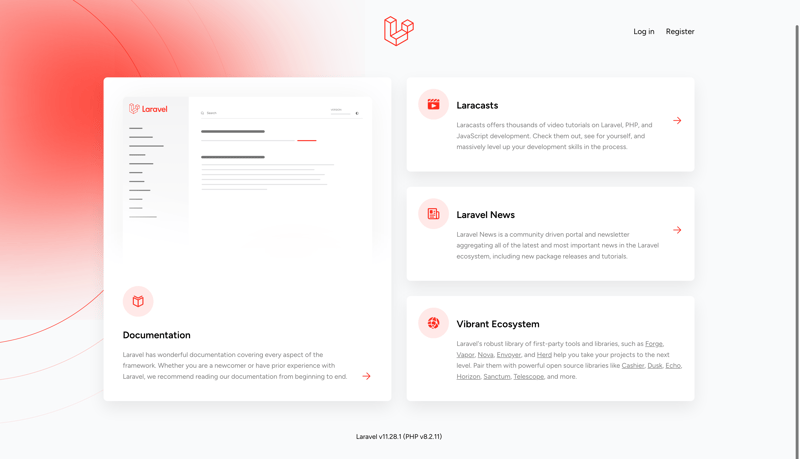
您现在应该在 localhost:8000 上看到新的 laravel 应用程序,如下所示:

您现在可以转到注册页面创建用户并访问仪表板,这是此时的整个应用程序。
模型设置
laravel 中的模型用于控制数据库表。使用以下命令在 app/models 文件夹中创建 todo 模型:
php artisan make:model todo
接下来,在新创建的文件中,用以下代码替换 todo 类:
class todo extends model
{
    use hasfactory;

    protected $fillable = [
        'title',
        'description',
        'completed',
        'user_id'
    ];

    public function user()
    {
        return $this->belongsto(user::class);
    }
}
上面的代码将使用户能够提交具有 $fillable 属性的表单;它还定义了用户和待办事项之间的关系;在这种情况下,待办事项属于用户。让我们通过将以下代码添加到 app/models/user.php 文件来完成关系设置:
    public function todos()
    {
        return $this->hasmany(todo::class);
    }
上面的代码将 user 模型连接到 todo 模型,以便它可以有很多待办事项。
迁移设置
laravel 中的迁移用于指定数据库表中应包含的内容。运行以下命令在 database/migrations 文件夹中创建迁移:
php artisan make:migration create_todos_table
接下来,将新文件中的 up 函数替换为以下内容,该函数会将 todo 表添加到数据库中,其中包含 id、user_id、title、description、completed 和 timestamp 列:
   public function up(): void
    {
        schema::create('todos', function (blueprint $table) {
            $table->id();
            $table->foreignid('user_id')->constrained()->ondelete('cascade');
            $table->string('title');
            $table->text('description')->nullable();
            $table->boolean('completed')->default(false);
            $table->timestamps();
        });
    }
接下来,运行以下命令将 todos 表添加到数据库中:
php artisan migrate
策略设置
laravel 中的策略允许您定义谁可以使用特定资源(在本例中为待办事项)执行哪些操作。
让我们通过使用以下命令在 app/policies 文件夹中生成 todopolicy 来看看它是如何工作的:
php artisan make:policy todopolicy --model=todo
接下来,在新创建的 todopolicy 文件中,将 todopolicy 类替换为以下代码:
class todopolicy
{
    /**
     * determine if the user can view any todos.
     */
    public function viewany(user $user): bool
    {
        return true;
    }

    /**
     * determine if the user can view the todo.
     */
    public function view(user $user, todo $todo): bool
    {
        return $user->id === $todo->user_id;
    }

    /**
     * determine if the user can create todos.
     */
    public function create(user $user): bool
    {
        return true;
    }

    /**
     * determine if the user can update the todo.
     */
    public function update(user $user, todo $todo): bool
    {
        return $user->id === $todo->user_id;
    }

    /**
     * determine if the user can delete the todo.
     */
    public function delete(user $user, todo $todo): bool
    {
        return $user->id === $todo->user_id;
    }
}
上面的代码指定用户可以创建待办事项,但只能查看、更新或删除属于自己的待办事项。
接下来,让我们在下一节中设置控制器。
控制器设置
laravel 中的控制器控制应用程序针对特定资源的功能。运行以下命令在 app/http/controllers 中生成 todocontroller:
php artisan make:controller todocontroller
在新建的todocontroller文件顶部添加以下代码,导入用于数据库操作的todo模型和用于授权的gate类:
use app/models/todo;
use illuminate/support/facades/gate;
指数法
将索引方法替换为以下代码,以获取并返回所有登录用户的待办事项:
    public function index()
    {
        gate::authorize('viewany', todo::class);
        $todos = auth()->user()->todos;
        return view('todos.index', compact('todos'));
    }
gate::authorize 方法验证用户是否使用您在上一节中定义的 viewany 策略方法登录。
创建方法
将 create 方法替换为以下代码,以验证用户是否已登录,然后再将创建待办事项表单返回给用户,以便他们可以创建待办事项:
    public function create()
    {
        gate::authorize('create', todo::class);
        return view('todos.create');
    }
储存方式
用以下代码替换 store 方法,检查用户是否可以创建待办事项、验证请求、创建待办事项并将用户重定向到待办事项列表页面:
public function store(request $request)
    {
        gate::authorize('create', todo::class);

        $validated = $request->validate([
            'title' => 'required|max:255',
            'description' => 'nullable'
        ]);

        $todo = auth()->user()->todos()->create($validated);

        return redirect()->route('todos.index')
            ->with('success', 'todo created successfully');
    }
编辑方法
将编辑方法替换为以下代码,以验证用户是否可以编辑该待办事项,然后将填充了所选待办事项的编辑待办事项表单返回给用户,以便他们可以对其进行编辑:
    public function edit(todo $todo)
    {
        gate::authorize('update', $todo);
        return view('todos.edit', compact('todo'));
    }
更新方法
用以下代码替换 update 方法,检查用户是否可以更新待办事项、验证请求、更新选定的待办事项并将用户重定向到待办事项列表页面:
    public function update(request $request, todo $todo)
    {
        gate::authorize('update', $todo);

        $validated = $request->validate([
            'title' => 'required|max:255',
            'description' => 'nullable'
        ]);

        $todo->update($validated);

        return redirect()->route('todos.index')
            ->with('success', 'todo updated successfully');
    }
销毁方法
用以下代码替换 destroy 方法,检查用户是否可以删除该待办事项,删除它,并将用户重定向到待办事项列表页面:
    public function destroy(todo $todo)
    {
        gate::authorize('delete', $todo);

        $todo->delete();

        return redirect()->route('todos.index')
            ->with('success', 'todo deleted successfully');
    }
您的 todocontroller 文件现在应该如下所示:
user()->todos;
        return view('todos.index', compact('todos'));
    }

    public function create()
    {
        gate::authorize('create', todo::class);
        return view('todos.create');
    }

    public function store(request $request)
    {
        gate::authorize('create', todo::class);

        $validated = $request->validate([
            'title' => 'required|max:255',
            'description' => 'nullable'
        ]);

        $todo = auth()->user()->todos()->create($validated);

        return redirect()->route('todos.index')
            ->with('success', 'todo created successfully');
    }

    public function edit(todo $todo)
    {
        gate::authorize('update', $todo);
        return view('todos.edit', compact('todo'));
    }

    public function update(request $request, todo $todo)
    {
        gate::authorize('update', $todo);

        $validated = $request->validate([
            'title' => 'required|max:255',
            'description' => 'nullable'
        ]);

        $todo->update($validated);

        return redirect()->route('todos.index')
            ->with('success', 'todo updated successfully');
    }

    public function destroy(todo $todo)
    {
        gate::authorize('delete', $todo);

        $todo->delete();

        return redirect()->route('todos.index')
            ->with('success', 'todo deleted successfully');
    }
}
视图设置
现在您的 todocontroller 方法已全部设置完毕,您现在可以通过在 resources/views 文件夹中创建一个新的 todos 文件夹来为您的应用程序创建视图。之后,在新的todos文件夹中创建create.blade.php、edit.blade.php、index.blade.php文件。
索引视图
将以下代码粘贴到index.blade.php中:
<x-app-layout><x-slot name="header"><h2 class="text-xl font-semibold leading-tight text-gray-800">
{{ __('todos') }}
</h2>
</x-slot><div class="py-12">
<div class="mx-auto max-w-7xl sm:px-6 lg:px-8">
<div class="overflow-hidden bg-white shadow-sm sm:rounded-lg">
<div class="p-6 bg-white border-b border-gray-200">
{{-- <div class="mb-4">
<a href="%7B%7B%20route('todos.create')%20%7D%7D" class="px-4 py-2 text-white bg-blue-500 rounded hover:bg-blue-600">
create new todo
</a>
</div> --}}
<div class="mt-6">
@foreach($todos as $todo)
<div class="mb-4 p-4 border rounded">
<h3 class="text-lg font-semibold">{{ $todo->title }}</h3>
<p class="text-gray-600">{{ $todo->description }}</p>
<div class="mt-2">
<a href="%7B%7B%20route('todos.edit',%20%24todo)%20%7D%7D" class="text-blue-500 hover:underline">edit</a>
<form action="%7B%7B%20route('todos.destroy',%20%24todo)%20%7D%7D" method="post" class="inline">
@csrf
@method('delete')
<button type="submit" class="ml-2 text-red-500 hover:underline" onclick="return confirm('are you sure?')">
delete
</button>
</form>
</div>
</div>
@endforeach
</div>
</div>
</div>
</div>
</div>
</x-app-layout>
创建视图
将以下代码粘贴到 create.blade.php 中:
<x-app-layout><x-slot name="header"><h2 class="text-xl font-semibold leading-tight text-gray-800">
            {{ __('create todo') }}
        </h2>
    </x-slot><div class="py-12">
        <div class="mx-auto max-w-7xl sm:px-6 lg:px-8">
            <div class="overflow-hidden bg-white shadow-sm sm:rounded-lg">
                <div class="p-6 bg-white border-b border-gray-200">
                    <form action="%7B%7B%20route('todos.store')%20%7D%7D" method="post">
                        @csrf

                        <div class="mb-4">
                            <label for="title" class="block text-gray-700">title</label>
                            <input type="text" name="title" id="title" class="w-full px-3 py-2 border rounded" required>
</div>

                        <div class="mb-4">
                            <label for="description" class="block text-gray-700">description</label>
                            <textarea name="description" id="description" class="w-full px-3 py-2 border rounded"></textarea>
</div>

                        <div class="flex items-center">
                            <button type="submit" class="px-4 py-2 text-white bg-green-500 rounded hover:bg-green-600">
                                create todo
                            </button>
                        </div>
                    </form>
                </div>
            </div>
        </div>
    </div>
</x-app-layout>
编辑视图
将以下代码粘贴到 edit.blade.php 中:
<x-app-layout><x-slot name="header"><h2 class="text-xl font-semibold leading-tight text-gray-800">
{{ __('edit todo') }}
</h2>
</x-slot><div class="py-12">
<div class="mx-auto max-w-7xl sm:px-6 lg:px-8">
<div class="overflow-hidden bg-white shadow-sm sm:rounded-lg">
<div class="p-6 bg-white border-b border-gray-200">
<form action="%7B%7B%20route('todos.update',%20%24todo)%20%7D%7D" method="post">
@csrf
@method('put')
<div class="mb-4">
<label for="title" class="block text-gray-700">title</label>
<input type="text" name="title" id="title" value="{{ $todo->title }}" class="w-full px-3 py-2 border rounded" required>
</div>
<div class="mb-4">
<label for="description" class="block text-gray-700">description</label>
<textarea name="description" id="description" class="w-full px-3 py-2 border rounded">{{ $todo->description }}</textarea>
</div>
<div class="flex items-center">
<button type="submit" class="px-4 py-2 text-white bg-blue-500 rounded hover:bg-blue-600">
update todo
</button>
</div>
</form>
</div>
</div>
</div>
</div>
</x-app-layout>
路线设置
使用 laravel 中的资源方法处理 todocontroller 的路由相对简单。通过将以下代码添加到 paths/web.php 文件夹的末尾来实现此目的,如下所示:
// rest of the file
Route::middleware(['auth'])->group(function () {
    Route::resource('todos', TodoController::class);
});
上面的代码使用了 auth 中间件来保护 todos 资源。登录后,您现在应该能够在应用程序中访问以下路线:
- /todos: 列出所有用户的待办事项
- /todos/create: 显示创建待办事项的表单
- /todos/edit/1:显示用于编辑给定 id 的待办事项的表单;在本例中为 1。
您现在可以创建、编辑和删除待办事项,但在编辑和删除时只能以登录用户和所选待办事项的所有者身份进行。
结论
就是这样!您刚刚创建了一个真实的待办事项应用程序,该应用程序允许用户仅创建、查看、编辑和删除自己的待办事项。如果您有任何更正、建议或问题,请在评论中告诉我!
最后,记得在 dev、linkedin 和 twitter 上关注我。非常感谢您的阅读,我们下一篇再见!
以上就是授权:了解 Laravel 中的策略的详细内容,更多请关注php中文网其它相关文章!